STEP I: PREPARATION
Remove Superior Rust control module from packaging and open up your engine compartment.


STEP I: PREPARATION
Remove Superior Rust control module from packaging and open up your engine compartment.
Step 2: MOUNTING RUST CONTROL MODULE
- Find a steady location where you will be mounting the rust control module.
- It is best to stay away from heat or any moving components. You also want to avoid moisture and debris.
- Ensure that the LED indicator is visible when mounted.


Step 3: Connecting Main(Grey) Wire
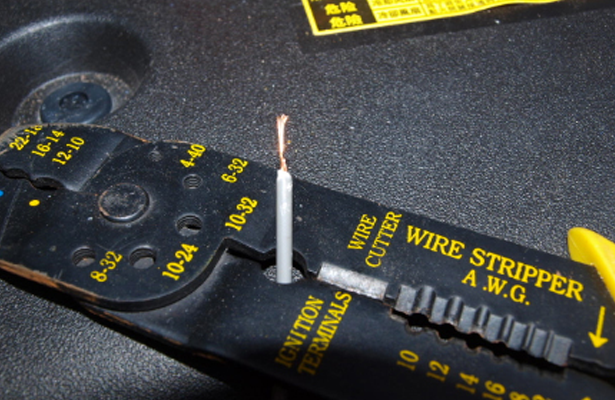
- You will need a wire stripper to strip and isolate the wire from the from the grey plactic coating.
- Using a crimper tighten a clip around the exposed wire.
- Connect the Grey wire to the structure or your vehicle. Ensure that the wire is making strong contact with bare metal. It is important to ensure that the rust module functions correctly. (in the example below we used strut tower bolts for grounding).

STEP 4: Connecting the Battery Wires
- Untighen the nut on the NEGATIVE battery terminal and insert the terminal of the BLACK ground wire first. Tighten back the nut once the connection is secure.
- Next, untighten the nut on the POSITIVE battery terminal of the red wire. Make sure this is only completed after the black wire is secure. Insert the terminal of the red wire and tighten the nut securely.
- If you have connected the two wires correctly than the BLUE LED on the Module will start flashing. The RED LED should light up and stay solid meaning its connected to the power source.


STEP 5: ATTACHING LOOSE WIRES
Loose wires should be tied up to the vechile using zip ties that are inlcuded in the package.
STEP 5: ATTACHING LOOSE WIRES
Loose wires should be tied up to the vechile using zip ties that are inlcuded in the package.

STEP 6: COMPLETION
Below is an image of how your module should look once it is properly set up and secured.

SEE HOW IT WORKS
Despite cars lasting longer and longer these days, an automotive service technician will notice that people often resell their car after around five years, in order to buy a newer model.
Testimonials
It’s hard to find anything unsatisfactory about our high quality products.

REX WATSON
We’ve used Superior Rustproofing on many vehicles int the past. We have been extremely thrilled with the results!

CASSIE VENTURA
Superior Rustproofing has exceeded our expectations when it comes to rustproofing. We highly recommend this product to all our families and friends.

BARNEY SMITH
We’ve used the Superior Rustproofing system in all of our vehicles. The installation is simple and can be moved between multiple vehicles.


